Wednesday, April 28, 2010
This blog is now located at http://gardengalkim.blogspot.com/.
You will be automatically redirected in 30 seconds, or you may click
here.
For feed subscribers, please update your feed subscriptions to
http://gardengalkim.blogspot.com/feeds/posts/default.
This blog is now located at http://gardengalkim.blogspot.com/.
You will be automatically redirected in 30 seconds, or you may click
here.
For feed subscribers, please update your feed subscriptions to
http://gardengalkim.blogspot.com/feeds/posts/default.
Tuesday, February 10, 2009
February is National Wild Bird Feeding Month
From the National Home Gardening Club:Celebrate National Wild Bird Feeding Month by offering up these tasty options for your feathered friends:
Blue jay - Peanut kernels and any type of
sunflower seed.
Cardinal - Sunflower seeds, cracked corn, unsalted nutmeats, and raisins.
Chickadee - Black-oil sunflower seeds, peanut kernels, and suet.
Finch - Thistle seeds and black-oil sunflower seeds.
Mourning dove - Cracked corn and black-oil.
Native sparrows - Millet, black-oil sunflower seeds, and cracked corn.
Nuthatch - Black-oil sunflower seeds and suet.
Robin - Any type of fruit.
Woodpecker - Suet, sunflower seeds, and peanuts.If you're not sure which types of birds will be visiting your yard, your best bet is black-oil sunflower seed and suet, which are high-calorie energy sources for a variety of species. Mixes are another great option. Cheaper versions contain large percentages of milo and rape seeds, which most backyard birds don't like. Buy a slightly pricier mix that contains plenty of sunflower seeds, millet, and cracked corn. Birds won't discard as much, your feeder won't empty as quickly, and you'll save money in the long run. Labels: bird feeder, Bird feeding, Birds
Tuesday, January 6, 2009
5 Ways to Recycle your Xmas Tree
From the National Home Gardening Club:
Once the holiday lights go out, give your Christmas tree new life with these five creative ways to extend its usefulness:
1. Winter birds will appreciate using the tree for shelter in your backyard. Secure the trunk to the ground with wire, twine, or stakes.
2. Entice even more backyard visitors by adding suet, molded seeds, or homemade treats such as pine cones smeared with peanut butter or strings of popcorn or cranberries.
3. Chop or grind smaller branches to make mulch for flowers, trees, and shrubs. Cut larger branches into small bundles that will offer winter protection when placed around newly planted perennials and small shrubs. Remove the branches in spring, when the plants begin to grow again.
4. If you have a fish pond, sink the tree to create a refuge and feeding area for fish.
5. Save the needles to create potpourri—a great gift idea for next holiday. Dry the branches, remove and crumble the needles, and mix with cinnamon sticks and whole cloves. Store in jars with lids.If you have no use for your tree, put it to good use in your community! Labels: national home gardening club, Recycling Xmas Christmas Trees
Thursday, December 18, 2008
Merry Christmas Poinsettia Sale!
I just received an email from Glick's Greenhouse in Oley, thanking patrons for making their annual Poinsettia Show (Dec. 5-8) a huge success!As a thank you to friends and community, they are currently having a sale. Here's their message: "Merry Christmas from Glick’s Greenhouse!
It was wonderful to see so many of you at our Poinsettia Show in the beginning of December! We have been blessed with another successful poinsettia season, and we are so grateful to each of you for helping to make it that way.
Another blessing this year is an abundance of plants! Poinsettia cuttings arrive at our greenhouses in June and require specific water, light, heat, and pruning to grow into beautiful plants by December. We are thankful for how well our plants have grown this year, as well as for the opportunity to give a Christmas gift to all of you:
Glick’s Greenhouse
Customer Appreciation Sale
December 18-24

Buy One 6.5” Poinsettia
Get One FREE
($8.95 value)
Buy One 5” Poinsettia
Get One FREE
($3.95 value)
AND the first 100 customers through our registers
will receive a free mini-well poinsettia!
Hope to see you soon!
We still have many varieties (red, white, pink, and more) of our highest quality poinsettias, as well as other Christmas plant and craft items available. The sale begins now and lasts until noon on Christmas Eve when we close for the season. We will re-open to the public in March."
Hours now through 12:00 noon on 12/24:
Monday-Saturday
8am-5:30pm
Closed Sunday
Glick’s Greenhouse
57 Fisher Mill Road
Oley, PA 19547
610-689-9856So stop on by and stock up on some beautiful holiday poinsettias to make your home festive this season!
Labels: Glicks Greenhouse, Poinsettia Show, poinsettias
Sunday, December 14, 2008
Poinsettia Tips
Here's six easy tips from the National Home Gardening Club on how to keep your poinsettias perfect this holiday season.When you buy your poinsettia, make sure it is wrapped properly. Exposure to low temperatures even for a few minutes can damage the bracts and leaves.
Place in indirect light. Six hours of light daily is ideal.
Keep it away from warm or cold drafts from radiators, registers, doors, and windows.
Poinsettias prefer daytime temperatures of 60°F to 70°F and night temperatures around 55°F. High temperatures will shorten the plant's life.
Check the soil daily. Water when soil is dry to the touch. Punch holes in the foil so water can drain into a saucer.
Fertilize the poinsettia after it finishes blooming (once the colorful bracts begin to fade) if you keep it past the holiday season. Apply a houseplant fertilizer once a month.Once the lights of the holidays fade, try your hand at re-blooming your poinsettia for next season. Labels: poinsettias
Thursday, December 4, 2008
Glick's Greenhouse Poinsettia Show
 This weekend Glick's Greenhouse in Oley celebrates the season with their annual Poinsettia Show! And it's a celebration not to be missed!
I've been going for the last five years at least, and it's become a holiday ritual for my family. Just a nice way to spend a Saturday afternoon and get into the spirit of Christmas! And I've honestly never seen more poinsettias in so many color combinations in my life...
This year's theme is Route 66. This historic highway once acted as a mirror of our nation’s times, both the good and the bad. Crossing 8 states, 3 time zones, and more than 2400 miles, it was the first continuously paved highway in the United States. Though it gained the designation as an official U.S. highway in 1926, this status only remained until 1985. "America’s Main Street" had officially been replaced by four-lane highways.
As one of the characters in the Disney movie Cars said, "Back then, people didn’t drive to make good time…they drove to have a good time." This Christmas the family at Glick's hope you’ll join them for a journey. It’s a journey through small-town America, through United States' history, and through life. We know you’ll have a good time on this trip and look forward to seeing you along the way!
So get your kicks on Route 66 ... at Glicks! 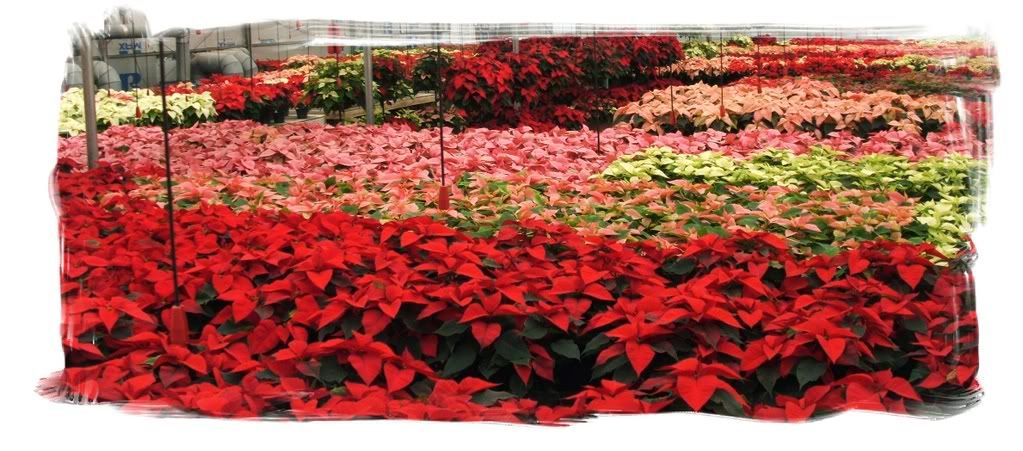
Glick's Greenhouse Poinsettia Show runs from Friday thru Monday (closed Sunday). Hours are 9 a.m.-9 p.m. Friday and Monday and 9 a.m.-5 p.m. Saturday.
There will also be plenty of music on hand.
Music Schedule
Friday Dec. 5th
10:00-11:30 Keri Houp (Piano)
11:30-12:30 Leonard Stoltzfus (Accordion)
1:00-2:30 Berks Christian School Choir
2:30-4:00 Cammi Glick (Piano)
5:00-6:30 Damien Drago (Guitar/Vocal)
7:00-8:30 Camerata String Quartet
Saturday Dec. 6th
10:00-12:00 Hiram Ring (Guitar/Vocal)
12:00-1:00 Inglin Family (Instrumental/Vocal)
1:00-2:00 Andrew Uchida (Guitar/Vocal)
2:00-4:00 West Chester Octet (Vocal)
4:00-5:00 Boyertown String Quartet
Monday Dec. 8th
10:00-11:00 Angela Ludwig (Piano)
11:00-12:30 Keri Houp (Piano)
12:30-1:30 Angela Ludwig (Piano)
1:30-2:30 Keri Houp (Piano)
4:00-5:00 Leonard Stoltzfus (Accordion)
5:00-6:30 Dave Reichard (Guitar/Vocal)
7:00-8:30 Ringalier Hand Bell Choir
Glicks's Greenhouse is located at 57 Fisher Mill Road, Oley. For more information visit www.glicksgreenhouse.com or call 610-689-9856. Glick's will be closed today to prepare for the show!
Merry Christmas!Labels: Christmas, Glick's Greenhouses, Poinsettia Show
 RSS
RSS